Monday 25 May 2015

How To Save the Console log into a Specific Directory And How to fine tune ADF diagnostics logging In ADF 12C

Hi Guys, Today I'll Show you how to save the Console Log into a specific Directory and How to do the Diagnostic logging in ADF 12C.

While running your Fusion Application, the console output of the embedded Weblogic server is displayed in the log Pane of JDeveloper


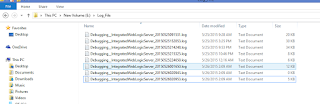
You can also save the console log into a particular directory go to -->Tools -->Preferences --> log then specify the directory and Maximum Log Lines and once you will run the application,you will find the log file in that particular directory.

                                              
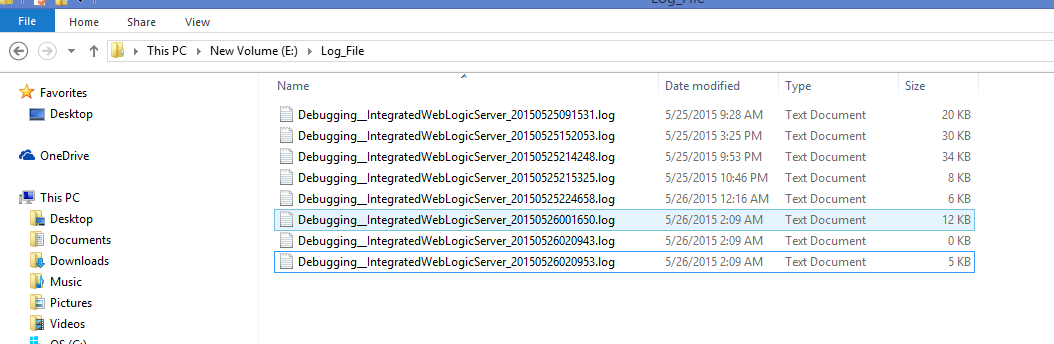
Now you see the log file Also in E:\Log_File Directory.


Now I'll Show you, How to diagnostic logging.
ADF Diagnostic Logging is good feature in J Developer by which we can fine tune the log generation of our Apps.

ADF diagnostics logging is controlled via the usage of the jbo.debugoutput parameter. Using this parameter with the console value, i.e. -Djbo.debugoutput=console, produces diagnostic logs directly in the J Developer Log window. When set to the ADF Logger value, diagnostics are routed through the standard J2SE Logging API and is controlled through the logging.xml configuration file. For the integrated Web Logic server this file can be found the C:\Users\USER\AppData\Roaming\JDeveloper\system12.1.3.0.41.140521.1008\DefaultDomain\config\fmwconfig\servers\DefaultServer for Windows 7

In the Application Server Navigator – use View | Application Server Navigator to display if needed – expand the Application Servers node and right-click on the IntegratedWebLogicServer and From the context menu select Configure Oracle Diagnostic Logging for “IntegratedWebLogicServer”.


Now Open the logging.xml In the Loggers section expand the Root Logger (default) node to display all the loggers that are declared.


The three columns in the Overview tab display the Name of the logger, the diagnostics logging Level for the logger and any log handlers associated with the logger. The Name of the logger represents the Java package that will be generating the specific diagnostics logs. The Level value specifies the granularity of the diagnostic logs to be generated and it is defined either in terms of the ODL (Oracle Diagnostics Logging) Log Levels below.


And java log level is below -


You can control the Log Level type (ODL or Java) through the drop down on the top right just above the Declares Handles column.

The Declares Handles column associates one or more log handlers to the specific logger. To illustrate, select a logger that has an associated log handler - an icon in the Declares Handles column - and expand the Handler Declarations section to display the associated log handlers.


OK. Let's generate some diagnostics now. Select the oracle.jbo logger in the Loggers tree and set its Level to FINEST – you may need to switch the log type to Java Log Types. This will override the default setting of the Root Logger in order to log all diagnostics generated by the oracle.jbo classes. There is no need to declare a specific handler, the one(s) defined for the Root Logger will be used as long as we ensure that the Use Parent Handlers check box remains selected. Make sure that you save the logging.xml file.


Before running your application open the ViewController Project Properties dialog, select the Run/Debug/Profile page and Edit… the Run Configuration. In the Edit Default Configuration dialog Launch Settings enter -Djbo.debugoutput=adflogger -Djbo.adflogger.level=FINEST in the Java Options


Save the Project Properties and run your application. Observe the oracle.jbo diagnostic logs generated in the Log window. The same log entries are written in the C:\Users\USER\AppData\Roaming\JDeveloper\system12.1.3.0.41.140521.1008\DefaultDomain\servers\DefaultServer\logs\DefaultServer-diagnostic.log file as well.


Now you can set log level as per your requirement and analyse the log.

Thanks Guys.

How to Show/Hide/Restrict the Operators in adf:query Advanced mode

Dear All, Here I'll explain how to Restrict the Operators like starts with/ends with ... in ADF criteria Query VO.

The ADF Faces af:query component neatly binds to an ADF bc View criteria defined in the model. 


In the default advanced mode, the query panel allows end users to select a suitable operator to apply to the query fields. The default list of these operators (of type JboCompOper) is populated based on the field's data type and ADF is rather intelligent with this feature - for example:
a) for an LOV based field, it displays an LOV if you select the Equals operator but changes to a text field when you choose the Starts-with operator...
b) It shows you two fields if you select the between operator. 

In my case I'll show you the default Behavior Firstly.


Now If Yo want to restrict the Operator then Go to particular VO select the Search Field and write the below code inside the <ViewAttribute> </ViewAttribute> tag.

<ViewAttribute

      Name="Ename"
      PrecisionRule="true"
      EntityAttrName="Ename"
      EntityUsage="EmpEO"
      AliasName="ENAME">
       <CompOper
          Name="Starts with"
          Oper="STARTSWITH"
          ToDo="-1"
          MinCardinality="0"
          MaxCardinality="0">
          </CompOper>
       <CompOper
          Name="Ends with"
          Oper="ENDSWITH"
          ToDo="-1"
          MinCardinality="0"
          MaxCardinality="0">
          </CompOper>
       <CompOper
          Name="Does not Contain"
          Oper="DOESNOTCONTAIN"
          ToDo="-1"
          MinCardinality="0"
          MaxCardinality="0">
          </CompOper>
       
        <CompOper
          Name="Less Than"
          Oper="&lt;"
          ToDo="-1"
          MinCardinality="0"
          MaxCardinality="0">
          </CompOper>
        <CompOper
          Name="Less Than Or Equal to"
          Oper="&lt;="
          ToDo="-1"
          MinCardinality="0"
          MaxCardinality="0"></CompOper>
        <CompOper
          Name="Does not Equal"
          Oper="&lt;>"
          ToDo="-1"
          MinCardinality="0"
          MaxCardinality="0"></CompOper>
        <CompOper
          Name="Greater than"
          Oper=">"
          ToDo="-1"
          MinCardinality="0"
          MaxCardinality="0"></CompOper>
        <CompOper
          Name="Greater than or equal to"
          Oper=">="
          ToDo="-1"
          MinCardinality="0"
          MaxCardinality="0"></CompOper>
        <CompOper
          Name="Between"
          Oper="BETWEEN"
          ToDo="-1"
          MinCardinality="0"
          MaxCardinality="0"></CompOper>
        <CompOper
          Name="Not Between"
          Oper="NOTBETWEEN"
          ToDo="-1"
          MinCardinality="0"
          MaxCardinality="0"></CompOper>
        <CompOper
          Name="Is Blank"
          Oper="ISBLANK"
          ToDo="-1"
          MinCardinality="0"
          MaxCardinality="0"></CompOper>
        <CompOper
          Name="Is Not Blank"
          Oper="ISNOTBLANK"
          ToDo="-1"
          MinCardinality="0"
          MaxCardinality="0"></CompOper>
    </ViewAttribute>


Here I am restricting the operators for EmpName field.
After Using this code you will find the below Output.


So this is the small code Which you need to change, Thanks All.


Saturday 23 May 2015

How To Generate Report in Xcel/Html Format in ADF 12C

Hi Guys, Today I'll give an idea related to Report.we have several ways to generate report in ADF .
we can integrate jasper report/BI report and normal excel and HTML format report.

Here I'll show you how can we generate normal excel format report.there are some steps which you need to follow and at the end you will able to save/open your report in the excel format.

S1. Create an Application and  project structure like below screen shot.


S2. Create Employee EO and VO and create one View criteria which will search on the basis of Emp        Name and Department Number.


S3. Create a page ExportReportDemo.jsf and drag Emp VO in that page with table.


S4. Create a command button and inside that button drag <af:exportCollectionActionListener /> from        the component palate.
   <h:commandButton value="Export to Excel" id="cb1"
                                 binding="#{backingBeanScope.backing_Pages_ExportReportDemo.cb1}">
                                <af:exportCollectionActionListener type="excelHTML"
                                                                   exportedId="resId1"/>
                </h:commandButton>
             

S5. Now run the Application you will get the below output.

                                                     
S6. Now click on Export to Excel button you will find below screen.


S7. Now open/save the report it will looks like below screen.


Guys you can download the application from the below url.

                               ExportReportApp

Thanks a lot guys for hearing me. 

Monday 11 May 2015

Generate Kaptcha Code in Oracle ADF 12c

Hi Guys,
This is very simple POC by which we can generate Kaptcha Code in ADF 12c.
Don't be very serious just follow the steps and at the end you will find the correct Apps.


CAPTCHA means - Completely Automated Public Turing test to tell Computers and Humans Apart.


For creating Kaptcha Code, we will follow very simple few steps:
S1Create a Fusion Web Application from the Jdev12c.

S2- Create a KaptchaDemo.jsf page under the below project structure -


S3- Generate KaptchaDemo.java class and create one RichInputText and one method like :

             //Binding of inputText to get entered value
    private RichInputText entrCaptchaCode;

    public void setEntrCaptchaCode(RichInputText entrCaptchaCode) {
        this.entrCaptchaCode = entrCaptchaCode;
    }

    public RichInputText getEntrCaptchaCode() {
        return entrCaptchaCode;
    }


    /**Method to check whether entered value is correct or not
     * * @param actionEvent     */  
    
    public void readCaptchCode(ActionEvent actionEvent) { 
        FacesContext fctx = FacesContext.getCurrentInstance();
        ExternalContext ectx = fctx.getExternalContext();  
        HttpServletRequest request = (HttpServletRequest) ectx.getRequest();
        
        //KAPTCHA_SESSION_KEY- The value for the kaptcha is generated and is put into the HttpSession.
        //This is the key value for that item in the session. 
        
        String kaptchaValExpected = (String)request.getSession().getAttribute(com.google.code.kaptcha.Constants.KAPTCHA_SESSION_KEY);
        
        //Get entered value of captcha using inputText binding  
        
        String kaptchaValRcvd = entrCaptchaCode.getValue().toString(); 
        System.out.println("Entered Value-" + kaptchaValRcvd + " Expected Value-" + kaptchaValExpected);  
        if (kaptchaValRcvd == null || !kaptchaValRcvd.equalsIgnoreCase(kaptchaValExpected)) { 
        FacesMessage errMsg = new FacesMessage("Entered Value Is Not Correct");  
        errMsg.setDetail("Incorrect captcha value"); 
        errMsg.setSeverity(FacesMessage.SEVERITY_ERROR);    
        
        fctx.addMessage(entrCaptchaCode.getClientId(), errMsg); 
        } else {   
        FacesMessage errMsg = new FacesMessage("Correct Value"); 
        errMsg.setDetail("Hello this is the right guess");    
        errMsg.setSeverity(FacesMessage.SEVERITY_INFO);       
        fctx.addMessage(entrCaptchaCode.getClientId(), errMsg);
        
    }
    }


bind entrCaptchaCode to the textbox in the .jsf page

S4- Add Kaptcha reference to web.xml file

         <servlet>
                <servlet-name>Kaptcha</servlet-name>
                     <servlet-class>com.google.code.kaptcha.servlet.KaptchaServlet</servlet-class>
        </servlet>
      <servlet-mapping>
               <servlet-name>Kaptcha</servlet-name>
                  <url-pattern>/kaptchaimage</url-pattern>
    </servlet-mapping>

S5- Download Kaptcha 2.3.2 jar file and add into the class path as:

                                         
S6- Now run the KaptchaDemo.jsf page and you will find the below Output -
                                       
     
S7- Now to change captcha image, add partialSubmit=false in the link                                                                    and set partial trigger property on af:image so you will get the below output.


S8- Here basic Kaptcha implementation is done and you can take a small break now :)
   
      For setting the lay outing and color of kaptcha Image you add some LOC in your web.xml file             like-

     <init-param>
        <param-name>kaptcha.border</param-name>
            <param-value>yes</param-value>
    </init-param> 
    <init-param> 
        <param-name>kaptcha.border.color</param-name>
            <param-value>green</param-value>
    </init-param>
    <init-param>
        <param-name>kaptcha.border.thickness</param-name>
            <param-value>2</param-value>
    </init-param> 
    <init-param> 
        <param-name>kaptcha.image.width</param-name> 
            <param-value>300</param-value> 
    </init-param>
    <init-param>
        <param-name>kaptcha.image.height</param-name>
            <param-value>90</param-value>
    </init-param>
    <init-param>
        <param-name>kaptcha.textproducer.font.size</param-name>
            <param-value>50</param-value> 
    </init-param> 
    <init-param>  
        <param-name>kaptcha.textproducer.font.color</param-name> 
            <param-value>yellow</param-value> 
    </init-param> 
    <init-param>  
        <param-name>kaptcha.background.clear.from</param-name>
            <param-value>red</param-value>
    </init-param>
    <init-param> 
        <param-name>kaptcha.textproducer.char.length</param-name>  
            <param-value>8</param-value>  
    </init-param>


here you can see advanced kaptcha code or you can customize the Image as per the requirement.

                                             
S9- you guys can download the Application from the below url :-


Thank you very much guys to hearing me :)

Eclipse With Python

Hi Guys, Today i'll share how to start python project in eclipse IDE. to start Py development in eclipse we need to add Py Dev plugi...