Wednesday 31 October 2018

Pagination Data Grid in Oracle JET

Hi All, In this post I'll share how to use pagination using Data grid in Oracle JET.I have created a JET Application for creating JET Application follow my previous post Oracle JET Application on Addition to that project i have added code in incidents.js and incidents.html file although i have created one employeeData.json file under js/data folder.

Now open incidents.js file and write the below code-

require(['ojs/ojcore', 'knockout', 'jquery', 'ojs/ojknockout',
    'ojs/ojdatagrid', 'ojs/ojcollectiondatagriddatasource', 'ojs/ojpagingcontrol', 'ojs/ojpagingdatagriddatasource'],
function(oj, ko, $)
{
    function viewModel() {
      var taskCollection, collection, datasource, pagingDatasource;
      taskCollection = oj.Collection.extend({
          url: 'js/data/employeeData.json'
      });
      collection = new taskCollection();
      datasource = new oj.CollectionDataGridDataSource(collection, {rowHeader: 'EMPLOYEE_ID'});
      this.pagingDatasource = ko.observable(new oj.PagingDataGridDataSource(datasource));
    }

    $(document).ready
    (
        function()
        {
            ko.applyBindings(new viewModel(),
                document.getElementById('pagingControlDemo'));
        }
    );
});

and open incidents.html file and write the below code -

<html lang="en-us" style="height:100%;" dir="ltr">
  <head>
    <script>!function(e){function r(r){r&&r.data&&r.data.boomr_mq&&(e.BOOMR_mq=e.BOOMR_mq||[],e.BOOMR_mq.push(r.data.boomr_mq))}e.addEventListener&&e.addEventListener("message",r);var a=e.navigator;a&&"serviceWorker"in a&&a.serviceWorker.addEventListener&&a.serviceWorker.addEventListener("message",r)}(window);</script>
    <title>Paging Control - Paging Data Grid</title>
    <meta charset="UTF-8">
    <meta http-equiv="x-ua-compatible" content="IE=edge">
    <meta http-equiv="Content-Type" content="text/html; charset=utf-8">
    <meta name="viewport" content="width=device-width, initial-scale=1.0">
    <link rel="icon" type="image/x-icon" href="../css/images/favicon.ico">
    <link rel="apple-touch-icon-precomposed" href="../css/images/touchicon.png">
    <meta name="apple-mobile-web-app-title" content="Oracle JET">
    <link rel="stylesheet" id="css" href="http://www.oracle.com/webfolder/technetwork/jet/css/libs/oj/v6.0.0/alta/oj-alta-min.css">
    <link rel="stylesheet" href="../css/demo.css">
    <script>
      // The "oj_whenReady" global variable enables a strategy that the busy context whenReady,
      // will implicitly add a busy state, until the application calls applicationBootstrapComplete
      // on the busy state context.
      window["oj_whenReady"] = true;
    </script>
    <script src="http://www.oracle.com/webfolder/technetwork/jet/js/libs/require/require.js"></script>
    <!-- RequireJS bootstrap file -->
    <script src="../js/main.js"></script>
    <script src="../js/demo.js"></script>
  
<script>!function(){function o(n,i){if(n&&i)for(var r in i)i.hasOwnProperty(r)&&(void 0===n[r]?n[r]=i[r]:n[r].constructor===Object&&i[r].constructor===Object?o(n[r],i[r]):n[r]=i[r])}try{var n=decodeURIComponent("");if(n.length>0&&window.JSON&&"function"==typeof window.JSON.parse){var i=JSON.parse(n);void 0!==window.BOOMR_config?o(window.BOOMR_config,i):window.BOOMR_config=i}}catch(o){window.console&&"function"==typeof window.console.error&&console.error("mPulse: Could not parse configuration",o)}}();</script>
<script>!function(e){var a="https://s.go-mpulse.net/boomerang/";if("False"=="True")e.BOOMR_config=e.BOOMR_config||{},e.BOOMR_config.PageParams=e.BOOMR_config.PageParams||{},e.BOOMR_config.PageParams.pci=!0,a="https://s2.go-mpulse.net/boomerang/";if(function(){function t(a){e.BOOMR_onload=a&&a.timeStamp||(new Date).getTime()}if(!e.BOOMR||!e.BOOMR.version&&!e.BOOMR.snippetExecuted){e.BOOMR=e.BOOMR||{},e.BOOMR.snippetExecuted=!0;var n,i,o,r=document.createElement("iframe");if(e.addEventListener)e.addEventListener("load",t,!1);else if(e.attachEvent)e.attachEvent("onload",t);r.src="javascript:void(0)",r.title="",r.role="presentation",(r.frameElement||r).style.cssText="width:0;height:0;border:0;display:none;",o=document.getElementsByTagName("script")[0],o.parentNode.insertBefore(r,o);try{i=r.contentWindow.document}catch(e){n=document.domain,r.src="javascript:var d=document.open();d.domain='"+n+"';void(0);",i=r.contentWindow.document}i.open()._l=function(){var e=this.createElement("script");if(n)this.domain=n;e.id="boomr-if-as",e.src=a+"DXNLE-YBWWY-AR74T-WMD99-77VRA",BOOMR_lstart=(new Date).getTime(),this.body.appendChild(e)},i.write("<bo"+'dy onload="document._l();">'),i.close()}}(),"".length>0)if(e&&"performance"in e&&e.performance&&"function"==typeof e.performance.setResourceTimingBufferSize)e.performance.setResourceTimingBufferSize();!function(){if(BOOMR=e.BOOMR||{},BOOMR.plugins=BOOMR.plugins||{},!BOOMR.plugins.AK){var a={i:!1,av:function(a){var t="http.initiator";if(a&&(!a[t]||"spa_hard"===a[t])){var n=""=="true"?1:0,i="",o=void 0!==e.aFeoApplied?1:0;if(BOOMR.addVar({"ak.v":15,"ak.cp":"82485","ak.ai":"165266","ak.ol":"0","ak.cr":57,"ak.ipv":4,"ak.proto":"h2","ak.rid":"db93f37","ak.r":20691,"ak.a2":n,"ak.m":"dscx","ak.n":"essl","ak.bpcip":"27.60.43.0","ak.cport":9067,"ak.gh":"96.17.182.93","ak.quicv":"","ak.tlsv":"tls1.2","ak.0rtt":"","ak.csrc":"-","ak.acc":"","ak.feo":o}),""!==i)BOOMR.addVar("ak.ruds",i)}},rv:function(){var e=["ak.bpcip","ak.cport","ak.cr","ak.csrc","ak.gh","ak.ipv","ak.m","ak.n","ak.ol","ak.proto","ak.quicv","ak.tlsv","ak.0rtt","ak.r","ak.acc"];BOOMR.removeVar(e)}};BOOMR.plugins.AK={init:function(){if(!a.i){var e=BOOMR.subscribe;e("before_beacon",a.av,null,null),e("onbeacon",a.rv,null,null),a.i=!0}return this},is_complete:function(){return!0}}}}()}(window);</script></head>
  <body class="demo-disable-bg-image">
    <div id="sampleDemo" style="" class="demo-padding demo-container">
      <div id="componentDemoContent" style="width: 1px; min-width: 100%;">
        
        <div id="pagingControlDemo">
            <oj-data-grid
                id="datagrid"
                aria-label="Data Grid with Paging Control"
                data="[[pagingDatasource]]"
                header.column.renderer="[[oj.KnockoutTemplateUtils.getRenderer('header_template')]]"
                header.column.style="width:125px"
                selection-mode.cell="single"
                style="width:100%; max-width:777px; height:300px">
            </oj-data-grid>
        
            <oj-paging-control id="paging" data='[[pagingDatasource]]' page-size="10"
                style="margin-top: 5px;">
            </oj-paging-control>
        </div>
        
        <script type="text/html" id="header_template">
            <!-- ko if: $context.key=='FIRST_NAME' -->
                <span data-bind="text: 'First Name'"></span>
            <!-- /ko -->
            <!-- ko if: $context.key=='LAST_NAME' -->
                <span data-bind="text: 'Last Name'"></span>
            <!-- /ko -->
            <!-- ko if: $context.key=='EMAIL' -->
                <span data-bind="text: 'Email Address'"></span>
            <!-- /ko -->
            <!-- ko if: $context.key=='PHONE_NUMBER' -->
                <span data-bind="text: 'Phone #'"></span>
            <!-- /ko -->
            <!-- ko if: $context.key=='HIRE_DATE' -->
                <span data-bind="text: 'Date Hired'"></span>
            <!-- /ko -->
            <!-- ko if: $context.key=='SALARY' -->
                <span data-bind="text: 'Salary'"></span>
            <!-- /ko -->
            <!-- ko if: $context.key=='DEPARTMENT_ID' -->
                <span data-bind="text: 'Department Id'"></span>
            <!-- /ko -->
        </script>

        
      </div>
    </div>
  </body>
</html>

here below points are important -
  • oj-data-grid element
  • oj-paging-control element
  • require ojdatagrid and create a PagingDataGridDataSource from a CollectionDataGridDataSource with fetch size equal to page size. 
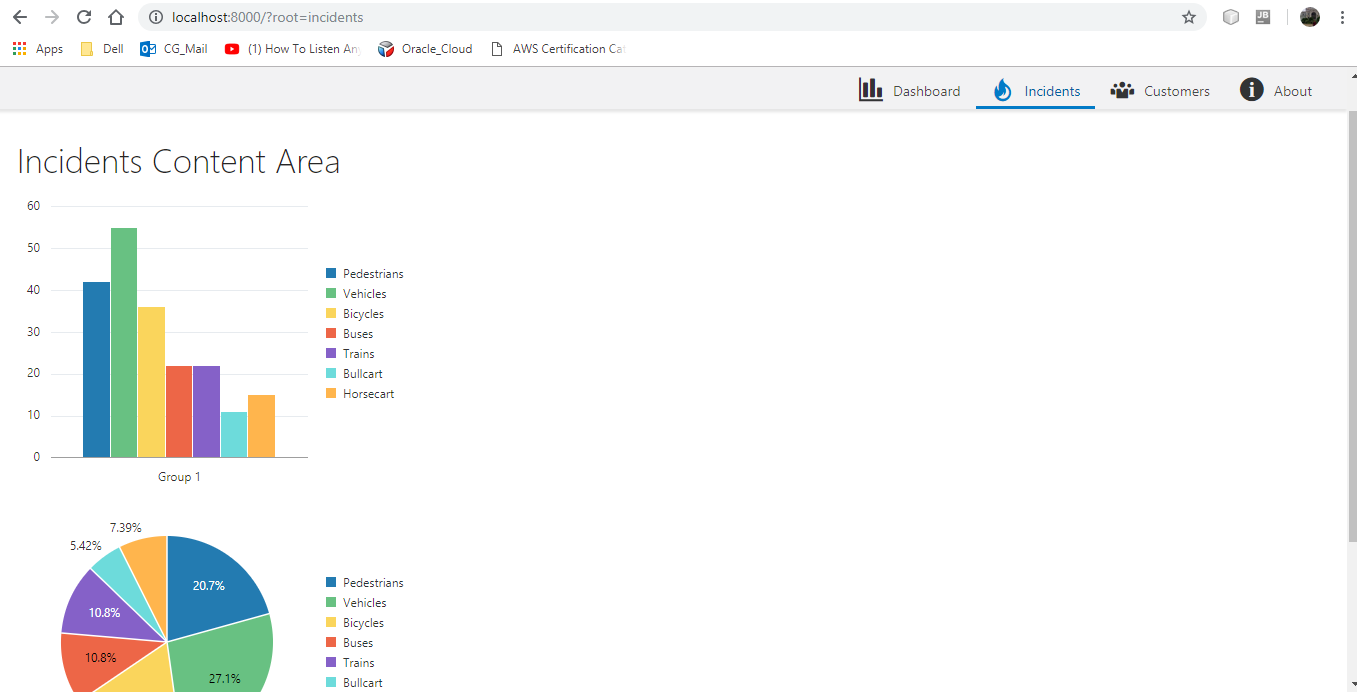
Now run the application and click on Incidents -


Cheers guys :)

Pagination Layout Option In Oracle JET

Hi Guys, In this post I'll share one of the experience related to Pagination Layout Option.
Sometimes we have requirement like we need to pagination as per selection.
in this post we can select various Paging Layout options via the check boxes to control what Paging controls are displayed.

To Implement the scenario create a JET Application using my previous post Pagination In Oracle JET
Now need to change small chunks of code.
Add one checkbox function inside the customers.js file-

function checkboxsetModel()
  {
    var self = this;
    self.pagingLayoutOption = ko.observableArray();
    self.valueChange = function(event)
    {
      var element = document.getElementById("paging");
      element.pageOptions = {'layout': event.detail.value, 'maxPageLinks': 6};
    };
  }

add a checkbox variable -
var cbm = new checkboxsetModel;

and apply the bindings-
ko.applyBindings(cbm, document.getElementById('checkboxSetId'));

add the checkbox code in customers.html file as well -
 <p>
        <div id="pagingLayoutOptionId"><b>Paging Layout Options</b></div>
        <br>
        <div id="pagingLayoutOptionId1">The checkboxes below control what values are set for the <i>layout</i> subproperty of the <i>pageOptions</i> property. Click on a checkbox to include it in the <i>layout</i> property array.</div>
        <br>
        <oj-checkboxset id="checkboxSetId" aria-labelledby="pagingLayoutOptionId"
                        value="{{pagingLayoutOption}}" on-value-changed="[[valueChange]]">
          <oj-option id="autoOptId" value="auto">auto - when auto set other values ignored</oj-option>
          <oj-option id="inputOptId" value="input">input</oj-option>
          <oj-option id="rangeTextOptId" value="rangeText">rangeText</oj-option>
          <oj-option id="pagesOptId" value="pages">pages</oj-option>
          <oj-option id="navOptId" value="nav">nav</oj-option>
        </oj-checkboxset>

Now run the page -
Now you can select the pagination layout and see the changes in pagination.

Cheers :)


Pagination In Oracle JET

Hi All,In this post I'll share how to implement pagination in Oracle JET application.
Create a JET Application sing my previous post JET Application now we'll create an ArrayTableDataSource using the JavaScript array.
will add the "idAttribute" property of the "options" parameter and create a PagingTableDataSource with the ArrayTableDataSource as parameter.
Create a JET Table which uses the PagingTableDataSource you created previously as input.
Inside the Table, create a JET PagingControl which also uses the PagingTableDataSource.
Set the "slot" attribute of the PagingControl to "bottom" and position it as a child of the Table, if desired, to align the PagingControl below the Table and Apply the binding.

To implement the same open the cstomers.js and write the code for department Array, and a function for applying bindings.

require(['ojs/ojcore', 'knockout', 'jquery', 'ojs/ojknockout', 'ojs/ojtable', 'ojs/ojpagingcontrol', 'ojs/ojpagingtabledatasource', 'ojs/ojarraytabledatasource'],
function(oj, ko, $)
{
  function viewModel()
  {
    var self = this;

    var deptArray = [{DepartmentId: 10015, DepartmentName: 'ADFPM 1001 neverending', LocationId: 200, ManagerId: 300},
        {DepartmentId: 556, DepartmentName: 'BB', LocationId: 200, ManagerId: 300},
        {DepartmentId: 10, DepartmentName: 'Administration', LocationId: 200, ManagerId: 300},
        {DepartmentId: 20, DepartmentName: 'Marketing', LocationId: 200, ManagerId: 300},
        {DepartmentId: 30, DepartmentName: 'Purchasing', LocationId: 200, ManagerId: 300},
        {DepartmentId: 40, DepartmentName: 'Human Resources1', LocationId: 200, ManagerId: 300},
        {DepartmentId: 50, DepartmentName: 'Administration2', LocationId: 200, ManagerId: 300},
        {DepartmentId: 60, DepartmentName: 'Marketing3', LocationId: 200, ManagerId: 300},
        {DepartmentId: 70, DepartmentName: 'Purchasing4', LocationId: 200, ManagerId: 300},
        {DepartmentId: 80, DepartmentName: 'Human Resources5', LocationId: 200, ManagerId: 300},
        {DepartmentId: 90, DepartmentName: 'Human Resources11', LocationId: 200, ManagerId: 300},
        {DepartmentId: 100, DepartmentName: 'Administration12', LocationId: 200, ManagerId: 300},
        {DepartmentId: 110, DepartmentName: 'Marketing13', LocationId: 200, ManagerId: 300},
        {DepartmentId: 120, DepartmentName: 'Purchasing14', LocationId: 200, ManagerId: 300},
        {DepartmentId: 130, DepartmentName: 'Human Resources15', LocationId: 200, ManagerId: 300},
        {DepartmentId: 1001, DepartmentName: 'ADFPM 1001 neverending', LocationId: 200, ManagerId: 300},
        {DepartmentId: 55611, DepartmentName: 'BB', LocationId: 200, ManagerId: 300},
        {DepartmentId: 1011, DepartmentName: 'Administration', LocationId: 200, ManagerId: 300},
        {DepartmentId: 2011, DepartmentName: 'Marketing', LocationId: 200, ManagerId: 300},
        {DepartmentId: 3011, DepartmentName: 'Purchasing', LocationId: 200, ManagerId: 300},
        {DepartmentId: 4011, DepartmentName: 'Human Resources1', LocationId: 200, ManagerId: 300},
        {DepartmentId: 5011, DepartmentName: 'Administration2', LocationId: 200, ManagerId: 300},
        {DepartmentId: 6011, DepartmentName: 'Marketing3', LocationId: 200, ManagerId: 300},
        {DepartmentId: 7011, DepartmentName: 'Purchasing4', LocationId: 200, ManagerId: 300},
        {DepartmentId: 8011, DepartmentName: 'Human Resources5', LocationId: 200, ManagerId: 300},
        {DepartmentId: 9011, DepartmentName: 'Human Resources11', LocationId: 200, ManagerId: 300},
        {DepartmentId: 10011, DepartmentName: 'Administration12', LocationId: 200, ManagerId: 300},
        {DepartmentId: 11011, DepartmentName: 'Marketing13', LocationId: 200, ManagerId: 300},
        {DepartmentId: 12011, DepartmentName: 'Purchasing14', LocationId: 200, ManagerId: 300},
        {DepartmentId: 13011, DepartmentName: 'Human Resources15', LocationId: 200, ManagerId: 300},
        {DepartmentId: 100111, DepartmentName: 'ADFPM 1001 neverending', LocationId: 200, ManagerId: 300},
        {DepartmentId: 55622, DepartmentName: 'BB', LocationId: 200, ManagerId: 300},
        {DepartmentId: 1022, DepartmentName: 'Administration', LocationId: 200, ManagerId: 300},
        {DepartmentId: 2022, DepartmentName: 'Marketing', LocationId: 200, ManagerId: 300},
        {DepartmentId: 3022, DepartmentName: 'Purchasing', LocationId: 200, ManagerId: 300},
        {DepartmentId: 4022, DepartmentName: 'Human Resources1', LocationId: 200, ManagerId: 300},
        {DepartmentId: 5022, DepartmentName: 'Administration2', LocationId: 200, ManagerId: 300},
        {DepartmentId: 6022, DepartmentName: 'Marketing3', LocationId: 200, ManagerId: 300},
        {DepartmentId: 7022, DepartmentName: 'Purchasing4', LocationId: 200, ManagerId: 300},
        {DepartmentId: 8022, DepartmentName: 'Human Resources5', LocationId: 200, ManagerId: 300},
        {DepartmentId: 9022, DepartmentName: 'Human Resources11', LocationId: 200, ManagerId: 300},
        {DepartmentId: 10022, DepartmentName: 'Administration12', LocationId: 200, ManagerId: 300},
        {DepartmentId: 11022, DepartmentName: 'Marketing13', LocationId: 200, ManagerId: 300},
        {DepartmentId: 12022, DepartmentName: 'Purchasing14', LocationId: 200, ManagerId: 300},
        {DepartmentId: 13022, DepartmentName: 'Human Resources15', LocationId: 200, ManagerId: 300}];
    self.pagingDatasource = new oj.PagingTableDataSource(new oj.ArrayTableDataSource(deptArray, {idAttribute: 'DepartmentId'}));
  }
  var vm = new viewModel;

  $(document).ready
  (
    function()
    {
      ko.applyBindings(vm, document.getElementById('pagingControlDemo'));
    }
  );
});

Now open customers.html and write the code for html page-

<html lang="en-us" style="height:100%;" dir="ltr">
  <head>
    <script>!function(e){function r(r){r&&r.data&&r.data.boomr_mq&&(e.BOOMR_mq=e.BOOMR_mq||[],e.BOOMR_mq.push(r.data.boomr_mq))}e.addEventListener&&e.addEventListener("message",r);var a=e.navigator;a&&"serviceWorker"in a&&a.serviceWorker.addEventListener&&a.serviceWorker.addEventListener("message",r)}(window);</script>
    <title>Paging Control - Paging Table</title>
    <meta charset="UTF-8">
    <meta http-equiv="x-ua-compatible" content="IE=edge">
    <meta http-equiv="Content-Type" content="text/html; charset=utf-8">
    <meta name="viewport" content="width=device-width, initial-scale=1.0">
    <link rel="icon" type="image/x-icon" href="../css/images/favicon.ico">
    <link rel="apple-touch-icon-precomposed" href="../css/images/touchicon.png">
    <meta name="apple-mobile-web-app-title" content="Oracle JET">
    <link rel="stylesheet" id="css" href="http://www.oracle.com/webfolder/technetwork/jet/css/libs/oj/v6.0.0/alta/oj-alta-min.css">
    <link rel="stylesheet" href="../css/demo.css">
    <script>
      // The "oj_whenReady" global variable enables a strategy that the busy context whenReady,
      // will implicitly add a busy state, until the application calls applicationBootstrapComplete
      // on the busy state context.
      window["oj_whenReady"] = true;
    </script>
    <script src="http://www.oracle.com/webfolder/technetwork/jet/js/libs/require/require.js"></script>
    <!-- RequireJS bootstrap file -->
    <script src="../js/main.js"></script>
    <script src="../js/demo.js"></script>
 
<script>!function(){function o(n,i){if(n&&i)for(var r in i)i.hasOwnProperty(r)&&(void 0===n[r]?n[r]=i[r]:n[r].constructor===Object&&i[r].constructor===Object?o(n[r],i[r]):n[r]=i[r])}try{var n=decodeURIComponent("");if(n.length>0&&window.JSON&&"function"==typeof window.JSON.parse){var i=JSON.parse(n);void 0!==window.BOOMR_config?o(window.BOOMR_config,i):window.BOOMR_config=i}}catch(o){window.console&&"function"==typeof window.console.error&&console.error("mPulse: Could not parse configuration",o)}}();</script>
<script>!function(e){var a="https://s.go-mpulse.net/boomerang/";if("False"=="True")e.BOOMR_config=e.BOOMR_config||{},e.BOOMR_config.PageParams=e.BOOMR_config.PageParams||{},e.BOOMR_config.PageParams.pci=!0,a="https://s2.go-mpulse.net/boomerang/";if(function(){function t(a){e.BOOMR_onload=a&&a.timeStamp||(new Date).getTime()}if(!e.BOOMR||!e.BOOMR.version&&!e.BOOMR.snippetExecuted){e.BOOMR=e.BOOMR||{},e.BOOMR.snippetExecuted=!0;var n,i,o,r=document.createElement("iframe");if(e.addEventListener)e.addEventListener("load",t,!1);else if(e.attachEvent)e.attachEvent("onload",t);r.src="javascript:void(0)",r.title="",r.role="presentation",(r.frameElement||r).style.cssText="width:0;height:0;border:0;display:none;",o=document.getElementsByTagName("script")[0],o.parentNode.insertBefore(r,o);try{i=r.contentWindow.document}catch(e){n=document.domain,r.src="javascript:var d=document.open();d.domain='"+n+"';void(0);",i=r.contentWindow.document}i.open()._l=function(){var e=this.createElement("script");if(n)this.domain=n;e.id="boomr-if-as",e.src=a+"DXNLE-YBWWY-AR74T-WMD99-77VRA",BOOMR_lstart=(new Date).getTime(),this.body.appendChild(e)},i.write("<bo"+'dy onload="document._l();">'),i.close()}}(),"".length>0)if(e&&"performance"in e&&e.performance&&"function"==typeof e.performance.setResourceTimingBufferSize)e.performance.setResourceTimingBufferSize();!function(){if(BOOMR=e.BOOMR||{},BOOMR.plugins=BOOMR.plugins||{},!BOOMR.plugins.AK){var a={i:!1,av:function(a){var t="http.initiator";if(a&&(!a[t]||"spa_hard"===a[t])){var n=""=="true"?1:0,i="",o=void 0!==e.aFeoApplied?1:0;if(BOOMR.addVar({"ak.v":15,"ak.cp":"82485","ak.ai":"165266","ak.ol":"0","ak.cr":68,"ak.ipv":4,"ak.proto":"h2","ak.rid":"dbe8699","ak.r":20691,"ak.a2":n,"ak.m":"dscx","ak.n":"essl","ak.bpcip":"27.60.43.0","ak.cport":9067,"ak.gh":"96.17.182.93","ak.quicv":"","ak.tlsv":"tls1.2","ak.0rtt":"","ak.csrc":"-","ak.acc":"","ak.feo":o}),""!==i)BOOMR.addVar("ak.ruds",i)}},rv:function(){var e=["ak.bpcip","ak.cport","ak.cr","ak.csrc","ak.gh","ak.ipv","ak.m","ak.n","ak.ol","ak.proto","ak.quicv","ak.tlsv","ak.0rtt","ak.r","ak.acc"];BOOMR.removeVar(e)}};BOOMR.plugins.AK={init:function(){if(!a.i){var e=BOOMR.subscribe;e("before_beacon",a.av,null,null),e("onbeacon",a.rv,null,null),a.i=!0}return this},is_complete:function(){return!0}}}}()}(window);</script></head>
  <body class="demo-disable-bg-image">
    <div id="sampleDemo" style="" class="demo-padding demo-container">
      <div id="componentDemoContent" style="width: 1px; min-width: 100%;">
       
        <div id="pagingControlDemo">
            <oj-table id='table' aria-label='Departments Table'
                   data='[[pagingDatasource]]'
                   columns='[{"headerText": "Department Id", "field": "DepartmentId"},
                             {"headerText": "Department Name", "field": "DepartmentName"},
                             {"headerText": "Location Id", "field": "LocationId"},
                             {"headerText": "Manager Id", "field": "ManagerId"}]'
                   style='width: 100%;'>
                <oj-paging-control id="paging" data='[[pagingDatasource]]' page-size='5' slot='bottom'>
                </oj-paging-control>
            </oj-table>
        </div>

       
      </div>
    </div>
  </body>
</html>   

I have taken page size 5, you can take as per your requirement.
Now save the env and run the application-

Cheers :)

Pictochart Dashboard in Oracle JET

Hi All, Today i'll share how to implement dashboard in JET Application.we can use pictochart for dashboard which can be define lot of sections.
we'll use oj-flex and oj-table in this implementation.
Create a dashboard JET Application using my previous post JET Application then open the dashboard.js file and write the below code inside the DashboardViewModel function-

 var colorHandler = new oj.ColorAttributeGroupHandler();
      var colorMap = {jb:0,jb2:0,ppn:1,ppn2:1,nma:2,nma2:2,rahh:3,rahh2:3,
        sm:4,sm2:4,idtp:5,idtp2:5,ja:6,ja2:6,cfe:7,cfe2:7};
      this.pictoChartItems1 = ko.observableArray([
        {id:"jb", name: 'Job Boards: 64%', shape: 'circle', count:36},
        {id:"jb2", name: 'Job Boards: 64%', shape: 'circle', color: colorHandler.getValue(colorMap["jb"]), count: 64}
      ]);
      $(".stat1").css({color: colorHandler.getValue(colorMap["jb"])});

      this.pictoChartItems2 = ko.observableArray([
        {id: "ppn", name: 'Personal/ Professional Networks: 11%', shape: 'circle', count:89},
        {id: "ppn2", name: 'Personal/ Professional Networks: 11%', shape: 'circle', color: colorHandler.getValue(colorMap["ppn"]), count: 11}
      ]);
      $(".stat2").css({color: colorHandler.getValue(colorMap["ppn"])});

      colorHandler.getValue(8);
      this.pictoChartItems3 = ko.observableArray([
        {id: "nma", name: 'Newspaper/ Magazine Advertising: 10%', shape: 'circle', count:90},
        {id: "nma2", name: 'Newspaper/ Magazine Advertising: 10%', shape: 'circle', color: colorHandler.getValue(colorMap["nma"]), count: 10}
      ]);
      $(".stat3").css({color: colorHandler.getValue(colorMap["nma"])});

      this.pictoChartItems4 = ko.observableArray([
        {id: "rahh", name: 'Recruitment Agencies/ Head Hunters: 5%', shape: 'circle', count:95},
        {id: "rahh2", name: 'Recruitment Agencies/ Head Hunters: 5%', shape: 'circle', color: colorHandler.getValue(colorMap["rahh"]), count: 5}
      ]);
      $(".stat4").css({color: colorHandler.getValue(colorMap["rahh"])});

      colorHandler.getValue(9);
      this.pictoChartItems5 = ko.observableArray([
        {id: "sm", name: 'Social Media: 3%', shape: 'circle', count:97},
        {id: "sm2", name: 'Social Media: 3%', shape: 'circle', color: colorHandler.getValue(colorMap["sm"]), count: 3}
      ]);
      $(".stat5").css({color: colorHandler.getValue(colorMap["sm"])});

      this.pictoChartItems6 = ko.observableArray([
        {id: "idtp", name: 'Internal Database/ Talent Pool: 3%', shape: 'circle', count:97},
        {id: "idtp2", name: 'Internal Database/ Talent Pool: 3%', shape: 'circle', color: colorHandler.getValue(colorMap["idtp"]), count: 3}
      ]);
      $(".stat6").css({color: colorHandler.getValue(colorMap["idtp"])});

      this.pictoChartItems7 = ko.observableArray([
        {id: "ja", name: 'Job Aggregators: 2%', shape: 'circle', count:98},
        {id: "ja2", name: 'Job Aggregators: 2%', shape: 'circle', color: colorHandler.getValue(colorMap["ja"]), count: 2}
      ]);
      $(".stat7").css({color: colorHandler.getValue(colorMap["ja"])});

      this.pictoChartItems8 = ko.observableArray([
        {id: "cfe", name: 'Careers Fair and Exhibitions: 1%', shape: 'circle', count:99},
        {id: "cfe2", name: 'Careers Fair and Exhibitions: 1%', shape: 'circle', color: colorHandler.getValue(colorMap["cfe"]), count: 1}
      ]);
      $(".stat8").css({color: colorHandler.getValue(colorMap["cfe"])});

      // Tooltip elem for data items
      var tooltipElem = document.createElement('div');
      tooltipElem.style.padding = '3px';
      tooltipElem.style.textAlign = 'center';
      tooltipElem.style.fontWeight = 'bold';
      tooltipElem.style.color = '#606060';

      this.tooltipFunction = function(dataContext) {
        // Set a thick border for the data item tooltip
        var colorVal = colorMap[dataContext.id];
        dataContext.parentElement.style.borderWidth = "4px";
        dataContext.parentElement.style.borderColor = colorHandler.getValue(colorVal);
        tooltipElem.textContent = dataContext.name;
        // Return the elem and the chart will append it to the parentElement
        return {'insert':tooltipElem};
      }
    }

    var dashboardViewModel= new DashboardViewModel();

    $(
      function() {
        ko.applyBindings(pictoChartModel, document.getElementById('chart-container'));
      }
    );


Change the define method as well -
(['ojs/ojcore', 'knockout', 'jquery', 'ojs/ojknockout', 'ojs/ojpictochart'],
 Now change the dashboard.html file as below -
<html lang="en-us" style="height:100%;" dir="ltr">
  <head>
    <title>PictoChart - Use Case: Dashboard</title>
    <meta charset="UTF-8">
    <meta http-equiv="x-ua-compatible" content="IE=edge">
    <meta http-equiv="Content-Type" content="text/html; charset=utf-8">
    <meta name="viewport" content="width=device-width, initial-scale=1.0">
    <link rel="icon" type="image/x-icon" href="../css/images/favicon.ico">
    <link rel="apple-touch-icon-precomposed" href="../css/images/touchicon.png">
    <meta name="apple-mobile-web-app-title" content="Oracle JET">
    <link rel="stylesheet" id="css" href="http://www.oracle.com/webfolder/technetwork/jet/css/libs/oj/v6.0.0/alta/oj-alta-min.css">
    <link rel="stylesheet" href="../css/demo.css">
    <script>
      // The "oj_whenReady" global variable enables a strategy that the busy context whenReady,
      // will implicitly add a busy state, until the application calls applicationBootstrapComplete
      // on the busy state context.
      window["oj_whenReady"] = true;
    </script>
    <script src="http://www.oracle.com/webfolder/technetwork/jet/js/libs/require/require.js"></script>
    <!-- RequireJS bootstrap file -->
    <script src="../js/main.js"></script>
    <script src="../js/demo.js"></script>
 
<script>!function(){function o(n,i){if(n&&i)for(var r in i)i.hasOwnProperty(r)&&(void 0===n[r]?n[r]=i[r]:n[r].constructor===Object&&i[r].constructor===Object?o(n[r],i[r]):n[r]=i[r])}try{var n=decodeURIComponent("");if(n.length>0&&window.JSON&&"function"==typeof window.JSON.parse){var i=JSON.parse(n);void 0!==window.BOOMR_config?o(window.BOOMR_config,i):window.BOOMR_config=i}}catch(o){window.console&&"function"==typeof window.console.error&&console.error("mPulse: Could not parse configuration",o)}}();</script>
<script>!function(e){function a(a){if(a&&a.data&&a.data.boomr_mq)e.BOOMR_mq=e.BOOMR_mq||[],e.BOOMR_mq.push(a.data.boomr_mq)}var t="https://s.go-mpulse.net/boomerang/";if("False"=="True")e.BOOMR_config=e.BOOMR_config||{},e.BOOMR_config.PageParams=e.BOOMR_config.PageParams||{},e.BOOMR_config.PageParams.pci=!0,t="https://s2.go-mpulse.net/boomerang/";if(function(){function a(a){e.BOOMR_onload=a&&a.timeStamp||(new Date).getTime()}if(!e.BOOMR||!e.BOOMR.version&&!e.BOOMR.snippetExecuted){e.BOOMR=e.BOOMR||{},e.BOOMR.snippetExecuted=!0;var n,i,r,o=document.createElement("iframe");if(e.addEventListener)e.addEventListener("load",a,!1);else if(e.attachEvent)e.attachEvent("onload",a);o.src="javascript:void(0)",o.title="",o.role="presentation",(o.frameElement||o).style.cssText="width:0;height:0;border:0;display:none;",r=document.getElementsByTagName("script")[0],r.parentNode.insertBefore(o,r);try{i=o.contentWindow.document}catch(e){n=document.domain,o.src="javascript:var d=document.open();d.domain='"+n+"';void(0);",i=o.contentWindow.document}i.open()._l=function(){var e=this.createElement("script");if(n)this.domain=n;e.id="boomr-if-as",e.src=t+"DXNLE-YBWWY-AR74T-WMD99-77VRA",BOOMR_lstart=(new Date).getTime(),this.body.appendChild(e)},i.write("<bo"+'dy onload="document._l();">'),i.close()}}(),"".length>0)if(e&&"performance"in e&&e.performance&&"function"==typeof e.performance.setResourceTimingBufferSize)e.performance.setResourceTimingBufferSize();if(function(){if(BOOMR=e.BOOMR||{},BOOMR.plugins=BOOMR.plugins||{},!BOOMR.plugins.AK){var a={i:!1,av:function(a){var t="http.initiator";if(a&&(!a[t]||"spa_hard"===a[t])){var n=""=="true"?1:0,i="",r=void 0!==e.aFeoApplied?1:0;if(BOOMR.addVar({"ak.v":13,"ak.cp":"82485","ak.ai":"165266","ak.ol":"0","ak.cr":54,"ak.ipv":4,"ak.proto":"h2","ak.rid":"b2ce734","ak.r":20691,"ak.a2":n,"ak.m":"dscx","ak.n":"essl","ak.bpcip":"106.205.42.0","ak.cport":17799,"ak.gh":"96.17.182.124","ak.quicv":"","ak.tlsv":"tls1.2","ak.0rtt":"","ak.csrc":"-","ak.acc":"","ak.feo":r}),""!==i)BOOMR.addVar("ak.ruds",i)}},rv:function(){var e=["ak.bpcip","ak.cport","ak.cr","ak.csrc","ak.gh","ak.ipv","ak.m","ak.n","ak.ol","ak.proto","ak.quicv","ak.tlsv","ak.0rtt","ak.r","ak.acc"];BOOMR.removeVar(e)}};BOOMR.plugins.AK={init:function(){if(!a.i){var e=BOOMR.subscribe;e("before_beacon",a.av,null,null),e("onbeacon",a.rv,null,null),a.i=!0}return this},is_complete:function(){return!0}}}}(),e.addEventListener)e.addEventListener("message",a);var n=e.navigator;if(n&&"serviceWorker"in n&&n.serviceWorker.addEventListener)n.serviceWorker.addEventListener("message",a)}(window);</script></head>
  <body class="demo-disable-bg-image">
    <div id="sampleDemo" style="" class="demo-padding demo-container">
      <div id="componentDemoContent" style="width: 1px; min-width: 100%;">
       
        <div id="chart-container">
          <h1>What is your preferred method of recruitment? (UK)</h1>
          <div class="oj-flex" style="margin: 5px; max-width: 820px;">
            <div class="oj-flex oj-sm-flex-direction-column" style="min-width:200px;display:inline-block;text-align: center;">
              <div class="oj-flex-item stat1" style="font-weight:bold;margin:10px;">Job <br/>Boards</div>
              <oj-picto-chart class="oj-flex-item" id='pictochart1'
                items="[[pictoChartItems1]]"
                tooltip.renderer="[[tooltipFunction]]"
                style="max-width:150px;width:100%;height:100%;max-height:150px;display:inline-block;">
              </oj-picto-chart>
              <div class="oj-flex-item stat1" style="margin:10px;background-color:#ececec;border-radius:5px;font-weight:bold;">64% </div>
            </div>
       
            <div class="oj-flex oj-sm-flex-direction-column" style="min-width:200px;display:inline-block;text-align: center;">
              <div class="oj-flex-item stat2" id="usage-stat1" style="font-weight:bold;margin:10px;"> Personal/ Professional <br/>Networks</div>
              <oj-picto-chart class="oj-flex-item" id='pictochart2'
                items="[[pictoChartItems2]]"
                tooltip.renderer="[[tooltipFunction]]"
                style="max-width:150px;width:100%;height:100%;max-height:150px;display:inline-block;">
              </oj-picto-chart>
              <div class="oj-flex-item stat2" style="margin:10px;background-color:#ececec;border-radius:5px;font-weight:bold;">11% </div>
            </div>
       
            <div class="oj-flex oj-sm-flex-direction-column" style="min-width:200px;display:inline-block;text-align: center;">
              <div class="oj-flex-item stat3" id="usage-stat2" style="font-weight:bold;margin:10px;">Newspaper/ Magazine <br/>advertising</div>
              <oj-picto-chart class="oj-flex-item" id='pictochart3'
                items="[[pictoChartItems3]]"
                tooltip.renderer="[[tooltipFunction]]"
                style="max-width:150px;width:100%;height:100%;max-height:150px;display:inline-block;">
              </oj-picto-chart>
              <div class="oj-flex-item stat3" style="margin:10px;background-color:#ececec;border-radius:5px;font-weight:bold;">10% </div>
            </div>
       
            <div class="oj-flex oj-sm-flex-direction-column" style="min-width:200px;display:inline-block;text-align: center;">
              <div class="oj-flex-item stat4" id="usage-stat3" style="font-weight:bold;margin:10px;">Recruitment agencies/<br/> Head Hunters</div>
              <oj-picto-chart class="oj-flex-item" id='pictochart4'
                items="[[pictoChartItems4]]"
                tooltip.renderer="[[tooltipFunction]]"
                style="max-width:150px;width:100%;height:100%;max-height:150px;display:inline-block;">
              </oj-picto-chart>
              <div class="oj-flex-item stat4" style="margin:10px;background-color:#ececec;border-radius:5px;font-weight:bold;">5% </div>
            </div>
       
            <div class="oj-flex oj-sm-flex-direction-column" style="min-width:200px;display:inline-block;text-align: center;">
              <div class="oj-flex-item stat5" id="usage-stat4" style="font-weight:bold;margin:10px;">Social <br/>Media</div>
              <oj-picto-chart class="oj-flex-item" id='pictochart5'
                items="[[pictoChartItems5]]"
                tooltip.renderer="[[tooltipFunction]]"
                style="max-width:150px;width:100%;height:100%;max-height:150px;display:inline-block;">
              </oj-picto-chart>
              <div class="oj-flex-item stat5" style="margin:10px;background-color:#ececec;border-radius:5px;font-weight:bold;">3% </div>
            </div>
       
            <div class="oj-flex oj-sm-flex-direction-column" style="min-width:200px;display:inline-block;text-align: center;">
              <div class="oj-flex-item stat6" id="usage-stat5" style="font-weight:bold;margin:10px;">Internal Database/ <br/>Talent Pool</div>
              <oj-picto-chart class="oj-flex-item" id='pictochart6'
                items="[[pictoChartItems6]]"
                tooltip.renderer="[[tooltipFunction]]"
                style="max-width:150px;width:100%;height:100%;max-height:150px;display:inline-block;">
              </oj-picto-chart>
              <div class="oj-flex-item stat6" style="margin:10px;background-color:#ececec;border-radius:5px;font-weight:bold;">3% </div>
            </div>
       
            <div class="oj-flex oj-sm-flex-direction-column" style="min-width:200px;display:inline-block;text-align: center;">
              <div class="oj-flex-item stat7" id="usage-stat6" style="font-weight:bold;margin:10px;"> Job Aggregators <br/> (eg. indeed)</div>
              <oj-picto-chart class="oj-flex-item" id='pictochart7'
                items="[[pictoChartItems7]]"
                tooltip.renderer="[[tooltipFunction]]"
                style="max-width:150px;width:100%;height:100%;max-height:150px;display:inline-block;">
              </oj-picto-chart>
              <div class="oj-flex-item stat7" style="margin:10px;background-color:#ececec;border-radius:5px;font-weight:bold;">2% </div>
            </div>
       
            <div class="oj-flex oj-sm-flex-direction-column" style="min-width:200px;display:inline-block;text-align: center;">
              <div class="oj-flex-item stat8" id="usage-stat7" style="font-weight:bold;margin:10px;"> Careers Fair and <br/>Exhibitions</div>
              <oj-picto-chart class="oj-flex-item" id='pictochart8'
                items="[[pictoChartItems8]]"
                tooltip.renderer="[[tooltipFunction]]"
                style="max-width:150px;width:100%;height:100%;max-height:150px;display:inline-block;">
              </oj-picto-chart>
              <div class="oj-flex-item stat8" style="margin:10px;background-color:#ececec;border-radius:5px;font-weight:bold;">1% </div>
            </div>
          </div>
        </div>

       
      </div>
    </div>
  </body>
</html>

now save the env and run the application-

if you are not getting the same outlook just change your define function in dashboard.js to require.

Cheers :)


Tuesday 30 October 2018

Train Component in Oracle JET

Hi friends, In this post I'll share how to implement Train Component in JET Application.
I have created default JET Application for creation of JET Application you can follow my previous post Create JET Application Now in the same application we can implement modules as a train.

Below are the steps -
S1- Open appController.js which is used to create global variable in the application.
S2- write the below code in the appController.js

self.stepArray =
        ko.observableArray(
                [{label:'Level 1', id:'dashboard'},
                 {label:'Level 2', id:'customers'},
                 {label:'Level 3', id:'incidents'},
                 {label:'Level 4', id:'about'},
                 {label:'Level 5', id:''},
                 {label:'Level 6', id:''},
                 {label:'Level 7', id:''}
               
             ]);
which means we are adding 7 Level in out app first 4 Levels are define and next 3 Level are null.

S3- Open index.html and remove Navigation List(oj-navigation-list) and copy below code-
<div id="train" 
       class="oj-train-stretch" 
       style="max-width:1500px;margin-left:auto;margin-right:auto;"
       data-bind="ojComponent:{
         component: 'ojTrain', 
         selectedStep: router.stateId, 
         steps: stepArray}">
      </div>

the above html code implement oj-train-stretch class instead of oj-navigation-list.
S4- Open main.js and add 'ojs/ojtrain' in define block.
       Now all is done.save all work space and run the application.
in next moment browser will appear with your train component.
Cheers :)

Picto Chart in Oracle JET

Hi Guys, In this post i'll share some data visualization concept.I have created a Picto Chart which we can use for Employee, Department to show how many resources are active in the org.
lets take a look for implementation part.

I have created a JET project and added my new module Employee in the project in previous post you can refer my previous post Add New Module in JET now i'll show you how to work on Picto Chart in Employee Module.

open employee.js file and add below code -
/*
 * To change this license header, choose License Headers in Project Properties.
 * To change this template file, choose Tools | Templates
 * and open the template in the editor.
 */

/**
 * employees module
 */
define(['ojs/ojcore', 'knockout', 'ojs/ojpictochart'
], function (oj, ko) {
    /**
     * The view model for the main content view template
     */
    function employeesContentViewModel() {
        var self = this;
        self.pictoChartItems = ko.observableArray([
        {name: 'Have Sleep Problems', shape: 'human', count:7, color: '#ed6647'},
        {name: 'Sleep Well', shape: 'human', count: 3}
      ]);
    }
   
    return employeesContentViewModel;
});


Now open your employees.html file and add below code-
<!--
To change this license header, choose License Headers in Project Properties.
To change this template file, choose Tools | Templates
and open the template in the editor.
-->
<div>
<h1>employees</h1>

<oj-picto-chart id='pictochart1' 
            items="[[pictoChartItems]]"
            animation-on-display="auto"
            column-count="5"
            style="vertical-align:middle; margin-right:15px">
</oj-picto-chart>
<div style="display:inline-block; vertical-align:middle; font-weight:bold">
            <span style="color:#333333; font-size:1.1em">7 out of 10 Employees </span><br>
            <span style="color:#ed6647; font-size:1.3em">have sleep problems.</span>
</div>
</div>
now you have done save your work space and the JET application.
in next minute below window will appear.
So that is how we can use picto chart in our application we can add more style and other element as per our requirement.

Cheers Guys :)

Oracle JET Complete Overview

Hi Guys, In this post I'll share the internal functioning of Oracle JET and JET Basics.
Oracle JET is serverless technology like javascript/angular/jquery. for JET structural overview you can read my previous post Oracle JET Background Now in this post I'll share the Functional overview.
In Oracle JET We have below main points to understands the control.
  • index.html
  • appController.js
  • viewModels
  • views
The main entry point in JET Application is index.html where we have ojRouter and oj-module.
It Provides how a JET web application with a navigation drawer as a single page application
using ojRouter and oj-module.  It contains the Oracle JET framework and a default
requireJS configuration file to show how JET can be setup in a common application.

ojRouter and oj-module navigate to appController.js
self.router.configure inside appController.js tell to controller which tab will display in the application and which will be default display, you can override the default behavior as well.
self.moduleConfig will have information about .js and .html file.same file of dashboard,incident are available in viewModela and views folder.

From viewModel folder .js file control the function and pass the control to .html file inside views folder.

So this would be flow-
index.html -->appController.js -->viewModel(.js file) -->views(.html file)

Cheers :)

Oracle JET Alta UI and Flex Layout

Hi Guys, In this post I'll share the flex layout and Alta ui basics.
I have created JET application ,for creation of JET Application you can refer my Previous post.
Now in customers.html file create flex container and play with different element.

customers.html file -
<!--
 Copyright (c) 2014, 2018, Oracle and/or its affiliates.
 The Universal Permissive License (UPL), Version 1.0
 -->
<div class="oj-hybrid-padding">
  <h1>Customers Content Area</h1>
  <div class="oj-flex ">

    <div class="oj-Sm-only-direction-column oj-flex-item oj-flex oj-panel oj-margin oj-panel-alt1">
       
      <div class="oj-flex-item oj-panel oj-margin oj-panel-alt2">
      </div>
      <div class="oj-flex-item oj-panel oj-margin oj-panel-alt3">
      </div>

    </div>

      <div class="oj-flex-item oj-panel oj-margin oj-panel-alt3">
      </div>
      <div class="oj-flex-item oj-panel oj-margin oj-panel-alt4">
      </div>
  <div>
</div>
flex container - I have create 4 flex container inside div tag.with different different oj element.
to segregate the container i have used one dive and put 2 flex container inside the div.
Alta UI - Here I have used different alta ui like alta1,alta2,alta3,alta4.

once you'll save the work space will get the changed browser.
Now you can play with different oj element and Alta UI.

Cheers:)


Add New Module In Oracle JET Application

Hi Guys, In this post I'll share how Oracle JET Added new module in existing project.
We have default JET Application created for JET App Creation follow my Previous post Oracle JET Application which includes Dashboard/Incidents/Customers/About modules.

Now We'll add new Module Employees into existing application.
We can create .js and .html files inside viewModel and views using netbeen IDE or using CLI.
I am creating using netbean IDE.
Right click on viewModel --> New --> Other --> HTML5/JavaScript --> Empty JET Module
Select js and html folder directory from the project and give the file name like in my case i have given employees.


Now file will loaded into main.js where we'll find the require followed by appController parameter.
in the appController we need to register our newly created Module.

I just copy paste the below code-
'employees': {label: 'Employees'},

and added code in var data -
{name: 'Employees', id: 'employees',
       iconClass: 'oj-navigationlist-item-icon demo-icon-font-24 demo-people-icon-24'},
Now save the workspace and refresh the browser.
We can see the newly added module in Application.
So Guys we can simply add as many as mudules require in Our application.

Cheers Guys :)

Monday 29 October 2018

Oracle JET pie/bar Component using data file

Hi Guys,
Today i'll share one experience which i have done in my one of real time project.
I implemented pie and bar chart static data sing json file.
to implement the graph using file we need to change the code in default JET project.
below are the steps by which we can get the graph using file system.
S1- create and run a JET project using below cmd in CLI.


S2- Now create a json file in js folder. right click on js-->New --> JSON File .
S3- enter some data for reference copy and paste below data.

data.json file -
[{
        "name": "Pedestrians",
        "items": [42]
    },
    {
        "name": "Vehicles",
        "items": [55]
    },
    {
        "name": "Bicycles",
        "items": [36]
    },
    {
        "name": "Buses",
        "items": [22]
    },
    {
        "name": "Trains",
        "items": [22]
    },
    {
        "name": "Bullcart",
        "items": [11]
    },
    {
        "name": "Horsecart",
        "items": [15]
    }]

S4- open the incidents.js file and add json file reference and parse the json file.
       define(['ojs/ojcore', 'knockout', 'jquery', 'text!data/data.json', 'ojs/ojchart'],
       function(oj, ko, $, file) {

      var data=JSON.parse(file);
      self.datasource = ko.observableArray(data);

S5- Now change the incidents.html file.
<!--
 Copyright (c) 2014, 2018, Oracle and/or its affiliates.
 The Universal Permissive License (UPL), Version 1.0
 -->
<div class="oj-hybrid-padding">
  <h1>Incidents Content Area</h1>
  
  <oj-chart type="bar"
series="[[datasource]]">
  </oj-chart>
  
  <oj-chart type="pie"
series="[[datasource]]">
  </oj-chart>
  <div>
      To change the content of this section, you will make edits to the incidents.html file located in the /js/views folder.
  </div>
</div>

S6- Now run the project and see the output in the browser-

That is how to load data from json file into JET Application.

Cheers Guys :)   


Oracle JET Component

Hi Guys, Today I'll share hoe to use bar and pie chart in Oracle JET.
I have created project using CLI,change the code in incidents.js and incidents.html file.
To implement the same follow the below steps-
S1- Create project and run.


Once run the project we can see the default implementation in browser click on Incidents tab and see the below page.


S2- Now change the code we have to remember 3 points-

  • Change the define method inside incidents.js file.
  • add the static data in js file and invoke observableArray method from knockout.
  • add the code inside incidents.html file.
Copy and paste the below code in incidents.js and incidents.html file.
incidents.js file -

/**
 * @license
 * Copyright (c) 2014, 2018, Oracle and/or its affiliates.
 * The Universal Permissive License (UPL), Version 1.0
 */
/*
 * Your incidents ViewModel code goes here
 */
define(['ojs/ojcore', 'knockout', 'jquery', 'ojs/ojchart'],
 function(oj, ko, $) {
  
    function IncidentsViewModel() {
      var self = this;
/*
 * Jet Component Example
 */   
  var data =[{name:"Pedestrians", items: [42]},
{name:"Vehicles", items: [55]},
{name:"Bicycles", items: [36]},
{name:"Buses", items: [22]},
{name:"Trains", items: [22]},
{name:"Bullcart", items: [11]},
{name:"Horsecart", items: [15]}];
self.datasource = ko.observableArray(data);

      // Below are a set of the ViewModel methods invoked by the oj-module component.
      // Please reference the oj-module jsDoc for additional information.

      /**
       * Optional ViewModel method invoked after the View is inserted into the
       * document DOM.  The application can put logic that requires the DOM being
       * attached here. 
       * This method might be called multiple times - after the View is created 
       * and inserted into the DOM and after the View is reconnected 
       * after being disconnected.
       */
      self.connected = function() {
        // Implement if needed
      };

      /**
       * Optional ViewModel method invoked after the View is disconnected from the DOM.
       */
      self.disconnected = function() {
        // Implement if needed
      };

      /**
       * Optional ViewModel method invoked after transition to the new View is complete.
       * That includes any possible animation between the old and the new View.
       */
      self.transitionCompleted = function() {
        // Implement if needed
      };
    }

    /*
     * Returns a constructor for the ViewModel so that the ViewModel is constructed
     * each time the view is displayed.  Return an instance of the ViewModel if
     * only one instance of the ViewModel is needed.
     */
    return new IncidentsViewModel();
  }
);

incidents.html file -

<!--
 Copyright (c) 2014, 2018, Oracle and/or its affiliates.
 The Universal Permissive License (UPL), Version 1.0
 -->
<div class="oj-hybrid-padding">
  <h1>Incidents Content Area</h1>
  
  <oj-chart type="bar"
series="[[datasource]]">
  </oj-chart>
  
  <oj-chart type="pie"
series="[[datasource]]">
  </oj-chart>
  <div>
      To change the content of this section, you will make edits to the incidents.html file located in the /js/views folder.
  </div>
</div>

Now save the file and see the browser, page will display the bar and pie chart -

Cheers Guys:)

Data Binding In Oracle JET

Hi Guys, In previous post i have explained basic data binding using span element Oracle JET Data Binding here i'll share more experiences with data bind.
Now I am changing the span data element to input and data bind type text to value so when you'll save the dashboard.html changes will reflect on browser.
whatever value you'll type in input box and tab out value will show in below header.

Now change the element data-bind="textInput" and save in this change no need to tabout we'll see the changes whatever type in input text without tab out.
So you can explore more data element.

Cheers Guys :)

Prevent TO Load All Region's task flow on Page load

Prevent ADF Region Load 

Hi Guys,I faced performance Issue in my application and needs to prevent to load heavy query at initial stage.
When you run a page, by default, all Called regions will be loaded at once during the initial display of the parent page.if a page contains N regions, N task flows are executed during the page load. This is acceptable if all regions are exposed to the user during the initial display of the page itself. What if some regions are displayed in a pop up or inside a tabbed pane?
You may definitely want to defer the execution of these regions until an end user opts to view them. ADF task flow has declarative support for such scenarios. The task flow binding provides an activation flag to control the activation of the underlying task flow.

To set the appropriate activation property for a task flow, open the page definition file in the overview editor--> Select the desired taskFlow entry in the Executables--> select the appropriate value for the activation property in the Property Inspector window.
You can choose one from the following list:

immediate: This option activates the region immediately on the initial display of parent page. This is the default value for the activation flag....

we can follow below Implementation steps-

S1- Create an ADF Fusion web Application
S2- Create Business components for Emp table
S3- Create a view criteria where deptno=:bind_variable
S4- Create viewImpl Class and copy paste below code then expose this as client interface.

public void searchEmployee(Number deptNo)
{
          // Code to seacrh the deptnos

        ensureVariableManager().setVariableValue("_bind_variable",  deptNo);
        this.applyViewCriteria(this.getViewCriteria("EmpViewCriteria"));
        this.executeQuery();
     
 }

S5- Create BTF.
S6 - Create Fragment on BTF and drop the above method on the BTF.
S7- drop the view activity(showEmp.jsff) .Define control flow case from the
       above method activity to the view activity.Set the method activity as
       default activity.
S8- Create  main.jspx page & drop the above taskflow as region on this page.

S9- Surround the region with the dialog & surround the dialog with the popup(id is Popup1)
       Drop the commandButton on the above page & insert showPopupBehavior inside                                 commandButton.

<af:commandButton text="show popup" id="cb1">
<af:showPopupBehavior popupId="::Popup1"/>
</af:commandButton>

S10- if we execute this main page ,we will notice that the method action 
         gets called even before the popup is launched.We can avoid this this by 
         setting the activation property of the taskflow to conditional

S11- Goto the bindings of the above main page--> select the taskflow binding -->set its activation               property to 'conditional'--> active property to Boolean value #{bean.popupVisible}.By default             its value should be false.

S12- setPropertyListener inside the popup:
      <af:setPropertyListener from="true" to="#{Somebean.popupVisible}" type="popupFetch"/>

S13- Now if we run the page,we will notice that the method action is not called 
        & only when we click on 'show popup' button the method action gets called.


So This is how we can prevent the regions to load by default while loading the main page.

Cheers Guys :)


Eclipse With Python

Hi Guys, Today i'll share how to start python project in eclipse IDE. to start Py development in eclipse we need to add Py Dev plugi...